Do you struggle to draw a circle or straight lines, no matter how hard you try? Do you struggle with how to draw accurately or draw two points with a specific distance between them? Even after carefully following detailed tutorials, do your drawings still appear inaccurate? These difficulties may stem from overlooked fundamental skills in drawing. A lack of basic skills that are ignored when learning drawing. but they also can be easily forgotten after a few years without a pencil in your hand.
In this tutorial (how to draw anything), I want to share with you 5 simple and 1 Bonus technique that will help your drawing and bring it to the next level.
How to Draw Anything – Step by Step
These problems may come from a lack of basic skills that are ignored when learning to draw pictures. These skills are obvious for someone who’s been drawing a lot, but they also can be easily forgotten after a few years without a pencil in your hand. So are you ready to catch up with the best drawing exercises for beginners?
1. Master Different Types of Lines
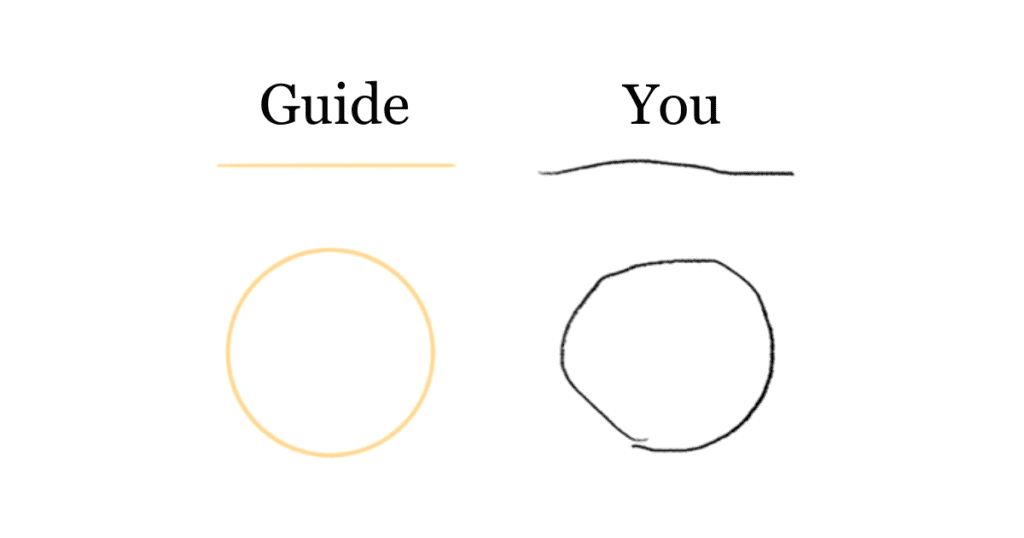
Your Challenge: you’re not able to draw a straight line or perfect circle.
Step 1
However, you can still improve your hand-drawn straight lines with practice and patience. Using a ruler to draw straight lines may be seen as taking a shortcut, but it’s a practical tool for achieving precision. There’s no harm in utilizing a ruler to create accurate lines, especially when precision is essential.
If drawing a long line is almost impossible, we can use short lines that our hand is more adapted to. This way it won’t matter what tool you use to draw straight lines; they’ll usually come out pretty good to draw anything. Just look at the picture below. The shorter the lines, the closer to the original the picture is.
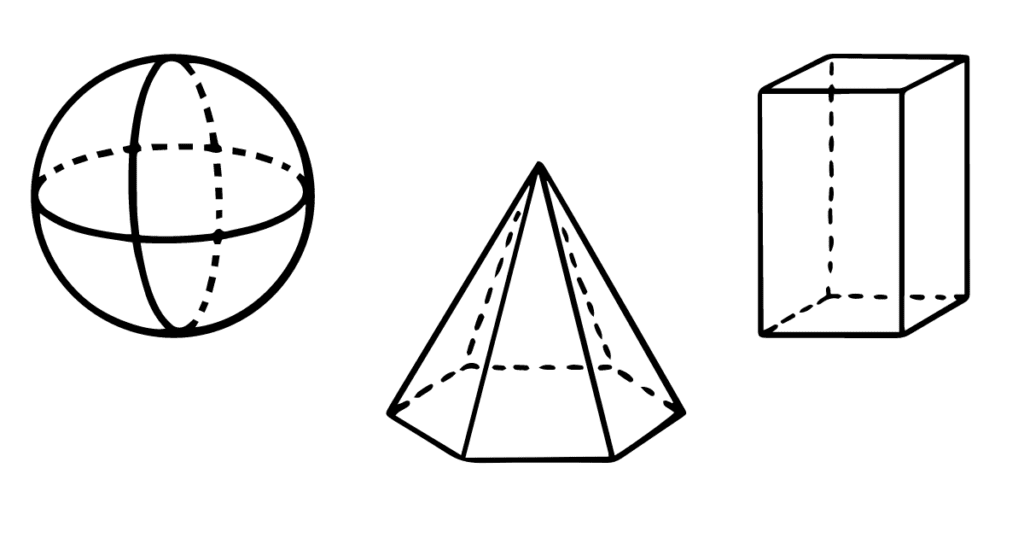
Step 2
Now that you’ve learned how to draw anything in a straight line, what should you practice?
- Geometric Shapes: Practice drawing basic geometric shapes such as circles, squares, triangles, and rectangles. This helps with control and precision.
- Freehand Lines: Challenge yourself with various types of lines – curves, zigzags, and spirals. This will improve your hand-eye coordination and fluidity.
- Contour Drawing: Focus on the outlines of objects without lifting your pencil. This exercise sharpens your observation skills and promotes a steady hand.
- Still Life Sketching: Set up a simple arrangement of objects and sketch them. This exercise improves your ability to capture details and proportions.
- Daily Sketch Journal: Maintain a daily sketch journal where your drawing captures your interest. This consistent practice helps you develop a drawing routine and improves overall skills.
- One-Line Drawing: Challenge yourself to draw an entire object or scene without lifting your pencil from the paper. This exercise enhances your focus and encourages a continuous flow in your drawings.
2. How to Measure and Draw Proportions
Your Challenge: you often find that the proportion in your drawings don’t quite match up. You feel like you can’t accurately draw a specific length without relying on a ruler or other tools.
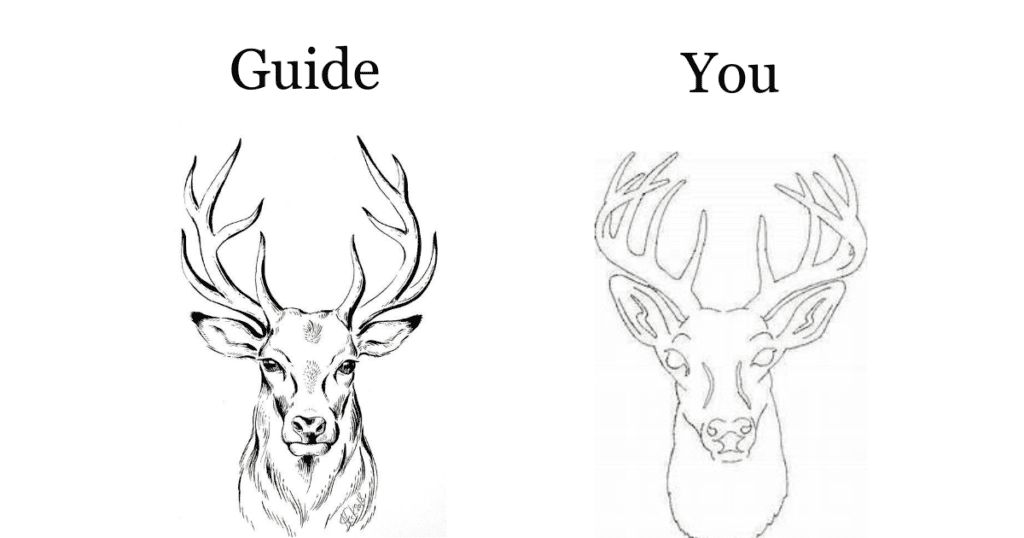
Step 1
Proportions refer to the relationships between the sizes of different elements in a drawing or painting. Accurate proportions are crucial for creating realistic and visually appealing artwork. You can practice drawing basic shapes and forms, learn about perspective and depth in art, and study figure drawing proportions about how to draw anything. By focusing on these techniques and practicing regularly,
Proportions aren’t just about measuring distances in specific units. They’re about how to draw anything in one element that relates to others in terms of position. In simpler terms, if you aim to draw the entire picture, or set of elements, twice as big, all the spaces and distances between them should also be doubled.
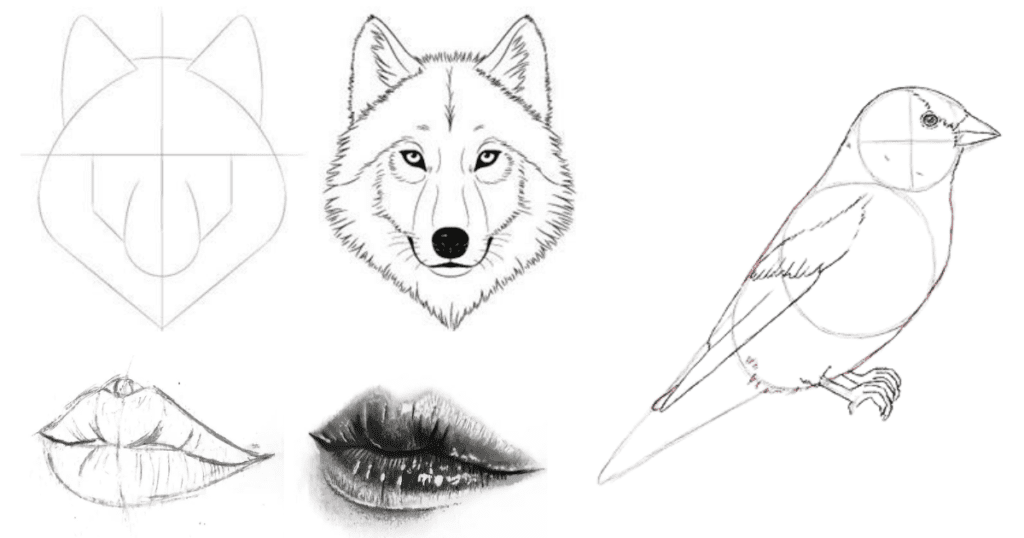
Step 2
Alright, let’s work on training our eyes to better grasp proportions. Take a shot at redrawing this picture, but this time, aim to make it half the size of the original.
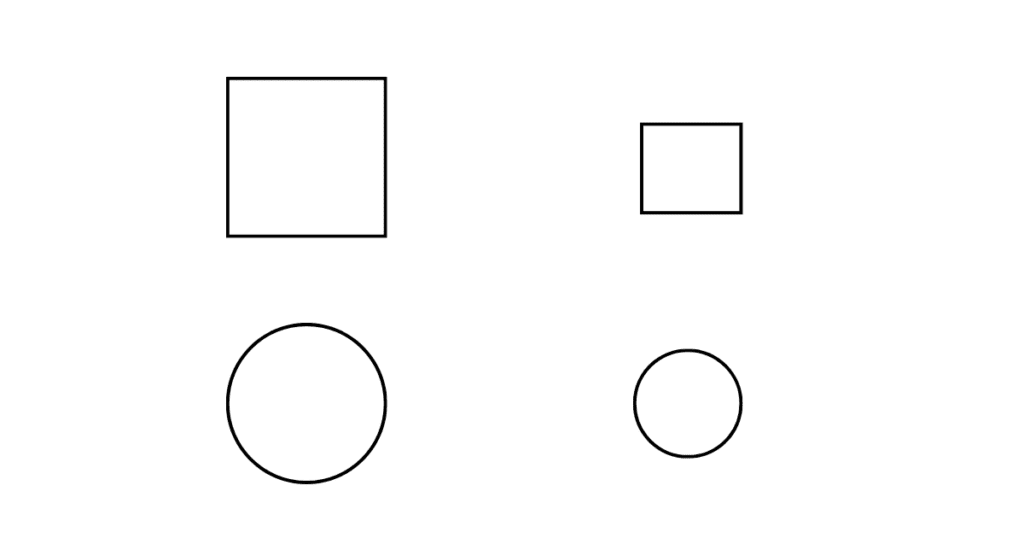
Step 3
Now, take a ruler and check if you got it right: the distance should be two times smaller than on the screen. And, how’s your result? Probably not very good, if you’re reading this drawing proportions tutorial (how to draw anything). Notice that the circles should be two times smaller too, and that seems almost impossible: how to draw anything or a circle or square that’s twice as big if you don’t even know the original size?
The answer is that we need at least two elements to talk about relativity. No matter what size the first element is, it can’t be unproportionable, if there’s only one! So let’s try again. Draw only the first circle or square.
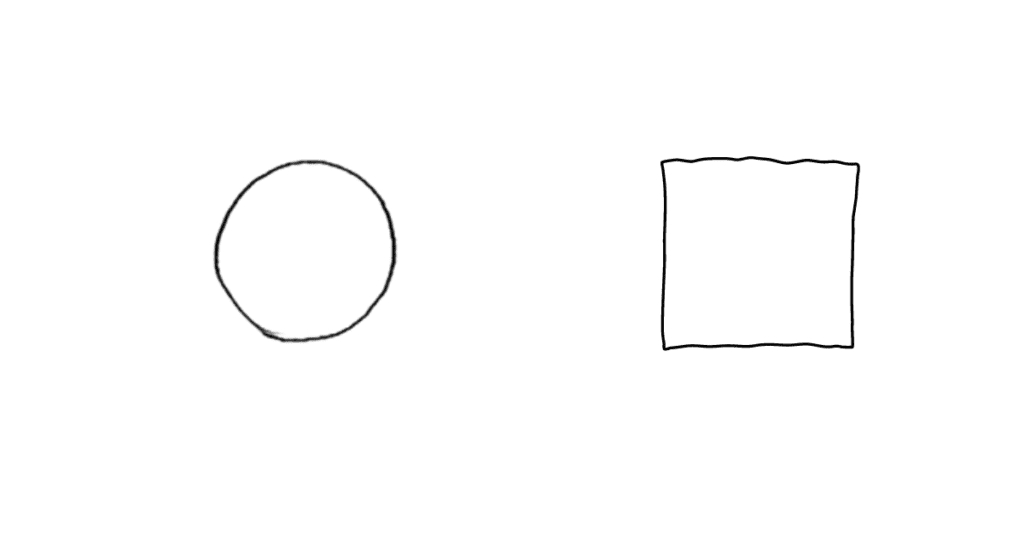
Here are some suggestions to help you along the way:
- Observation Practice: Train your eyes to carefully observe the proportions of objects around you. Pay attention to relationships between different elements and their sizes in comparison to one another.
- Grid Technique: Use a grid to break down your subject into smaller, more manageable sections. This can assist you in maintaining accurate proportions when transferring an image onto paper.
- Measuring with a Pencil: Hold your pencil at arm’s length and use it to measure proportions in your subject. Compare different parts by visually aligning them with your pencil, helping you estimate sizes more accurately.
- Start with Simple Shapes: Begin your drawings by blocking them in simple shapes and rough proportions. This provides a foundation that you can gradually refine as you work on details.
- Use Reference Images: Utilize reference images to guide you in understanding proper proportions. Pay attention to the relationships between various elements in the reference and try to replicate them in your drawings.
- Experiment with Size Variation: Practice drawing the same subject in different sizes. This helps you understand how proportions change when scaling up or down.
- Continuous Practice: Like any skill, improving at drawing proportions requires consistent practice. Set aside regular time for drawing exercises focused on proportions.
- Critique Your Own Work: Analyze your drawings critically. Identify areas where proportions might be off and think about how you can improve in future drawings.
- Online Tutorials and Courses: Explore online tutorials and courses that specifically focus on drawing proportions. Many platforms offer step-by-step guidance and exercises.
- Join Art Communities: Connect with other artists, either online or in person. Share your work, seek feedback, and learn from the experiences of those who have mastered the art of proportions.
Remember, improvement takes time, so be patient with yourself. Embrace the learning process and enjoy the journey of refining your drawing skills.
3. Free Your Hand
Your Challenge: Drawing parallel or concurrent lines can be quite a challenge for you. It seems like the second line often ends up heading in the wrong direction.
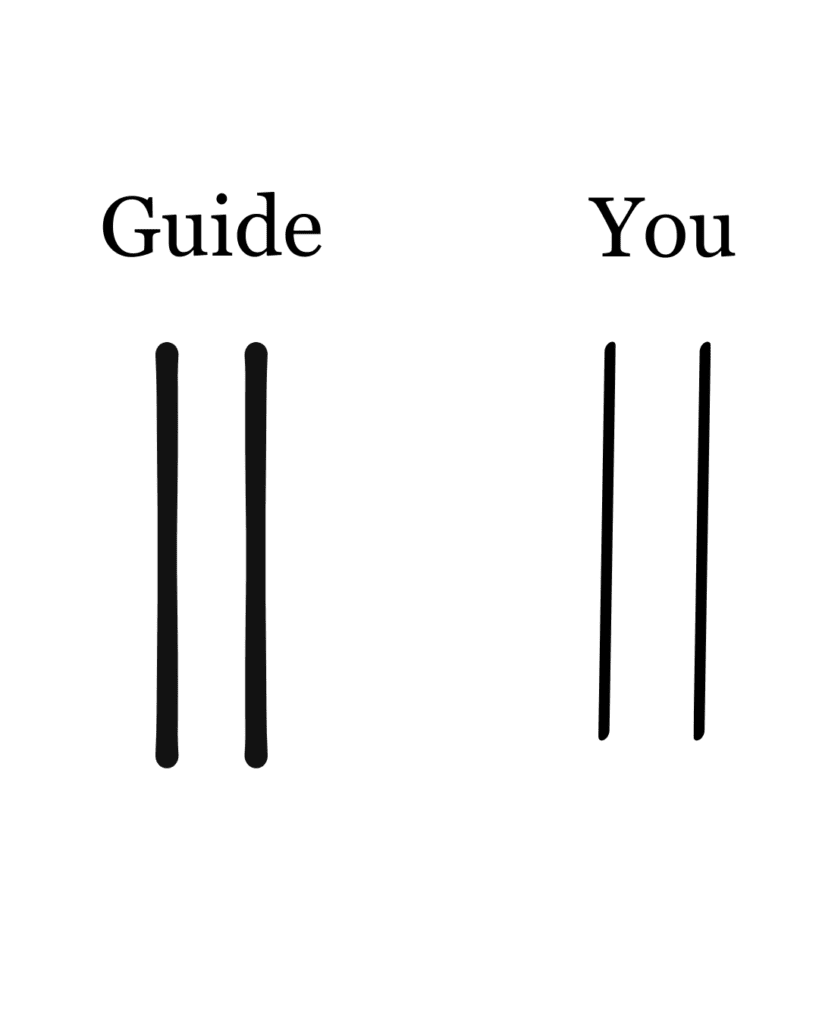
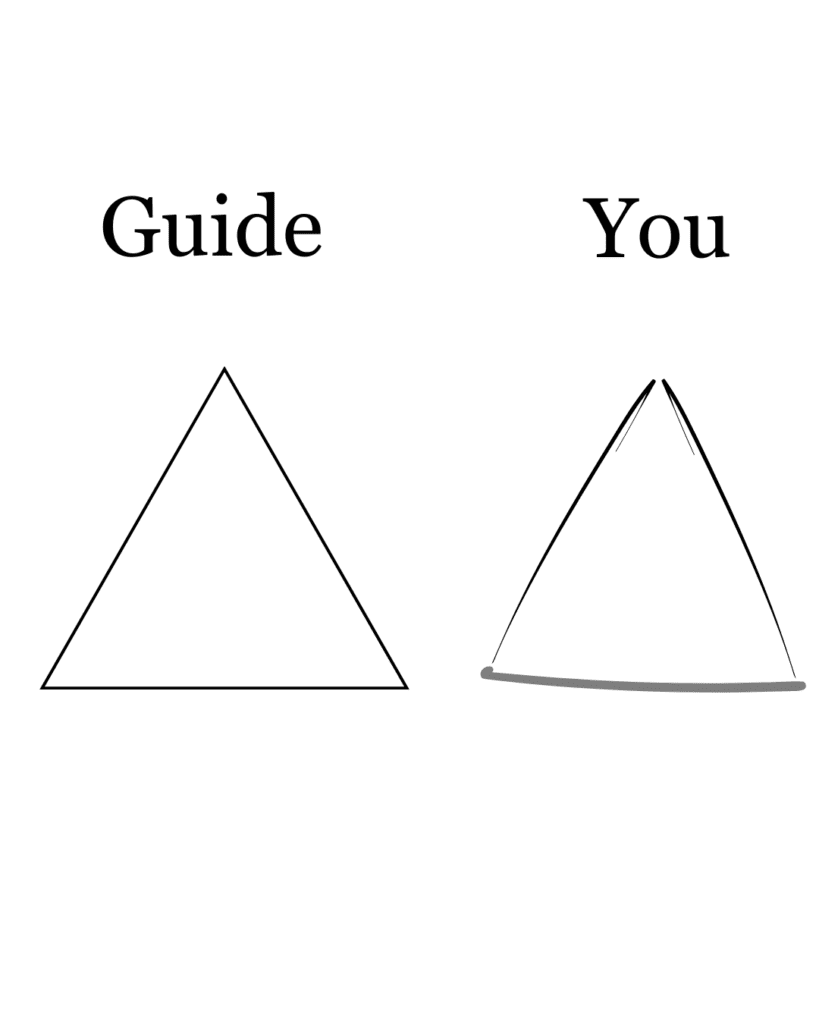
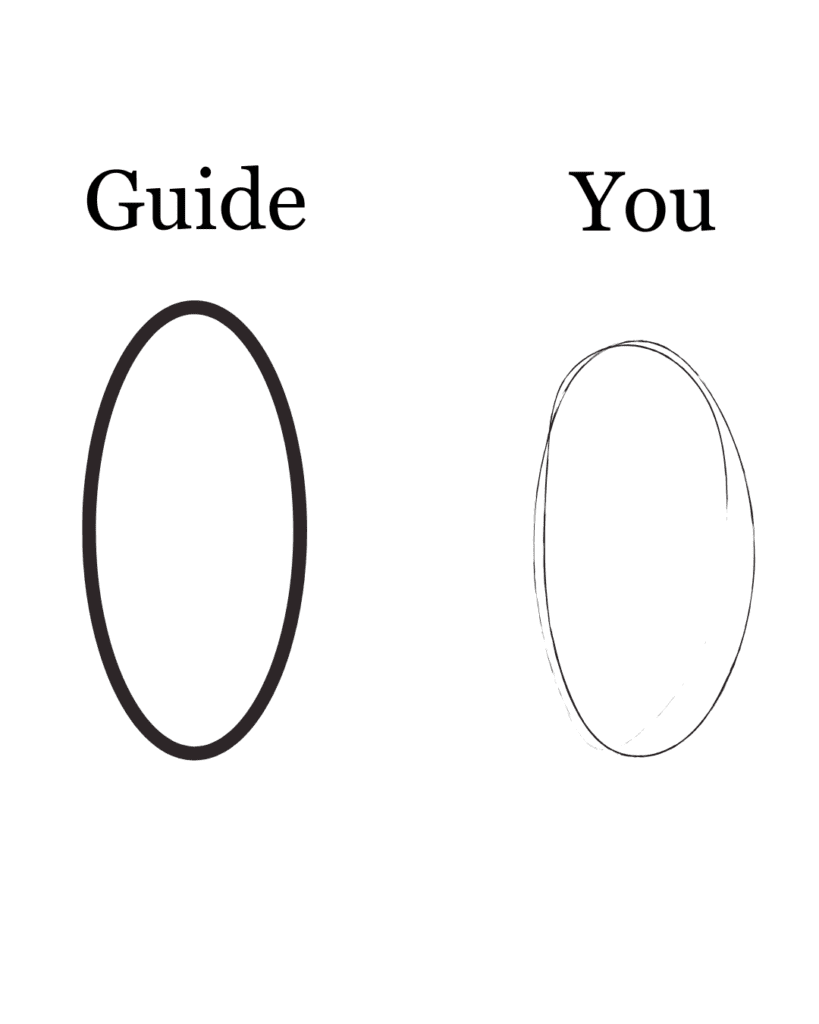
To improve your freehand drawing skills, frequent practice is essential. Gesture drawing is a valuable technique that involves capturing the essence and movement of a subject through quick sketches. Additionally, maintaining a dedicated sketchbook for freehand drawings and utilizing guidelines can aid in tracking your progress and ensuring accuracy. It’s also beneficial to study reference materials, such as photographs and drawings, to understand the relationships between different elements. Finally, consider exploring online resources and video tutorials for additional guidance and insights into enhancing your freehand drawing abilities.
Step 1
Practice frequently: Dedicate time to practice freehand drawing as often as possible. Make drawing a regular part of your routine, setting aside dedicated time for practice. Frequent and consistent sessions are essential to polish your freehand drawing skills. Embrace the learning process of how to draw anything, allowing yourself the space to experiment and grow. As you devote time to regular practice, you’ll notice gradual improvement and increased confidence in expressing your creativity through freehand drawing. Remember, each sketch is a step forward in your how-to-draw-anything journey.
Step 2
Use guidelines: Draw guidelines to help you establish the relationships between different elements in your drawing. This can help you check for accuracy and make adjustments as needed. These lines serve as a helpful framework, enabling you to gauge accuracy and make necessary adjustments. By implementing guidelines, you create a structural foundation that enhances the overall anything of your artwork. They act as a visual roadmap, aiding in maintaining proportion and ensuring a more precise and polished outcome. Embrace guidelines as valuable tools in refining your drawing and elevating your artistic skills.
Step 3
Study reference materials: Look at photographs, drawings, or paintings to understand the relationships between the sizes and shapes of different elements. This can help you develop a sense of how to draw anything like proportion and improve your accuracy. Observing these references enhances your understanding of proportion, refining your ability to depict accurate relationships. By studying various visuals, you’ll develop a keen eye for detail, translating into improved accuracy in your own drawings. Incorporate this practice regularly to elevate your artistic skills and bring a heightened sense of realism to your creations.
Step 4
Be Patient: Recognize that mastering freehand drawing takes time and evolves gradually. Maintain patience, persist in your efforts, and take joy in every step forward in how to draw anything series. Embrace the learning journey, understanding that progress is a continuous celebration. By staying dedicated and persistent, you not only refine your drawing skills but also build a deeper connection with your evolving artistic abilities. Revel in the process of how to draw anything, and you’ll find fulfillment in your artistic growth.
By following these steps and utilizing the resources provided, you can begin your drawing
journey to improve your freehand drawing skills.
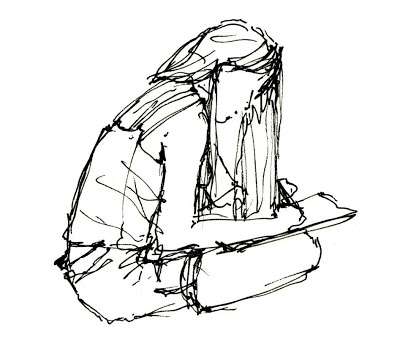
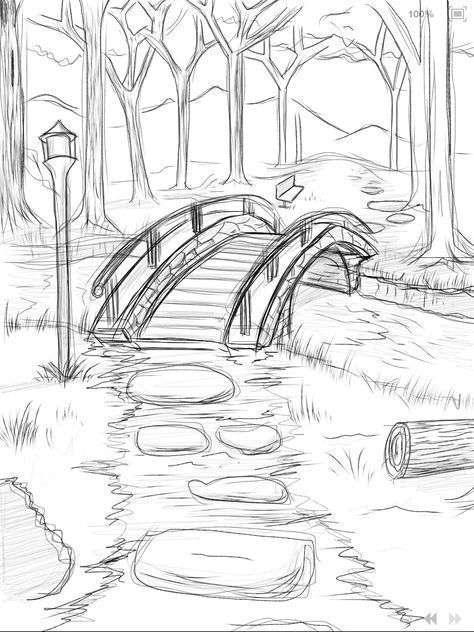
4. Draw More Quick Sketches
In the realism of artistic expression, the act of drawing pictures is not just a skill to be mastered but a continuous journey of exploration and refinement. Among the myriad techniques and practices that contribute to artistic growth, one often overlooked yet immensely valuable approach is the habit of producing more quick sketches.

1. The Power of Quick Sketches:
Quick sketches serve as dynamic snapshots of creative thought and visual interpretation. Unlike more detailed and time-consuming drawings, these swift renderings capture the essence of a subject with spontaneity. The beauty lies in their rawness and immediacy, offering a glimpse into the artist’s thought process and emotional response.
2. Enhancing Observational Skills:
Engaging in more quick sketches is akin to sharpening the blade of observation. As an artist, the ability to keenly observe and capture the essence of a subject in a short time frame is a valuable skill. Quick sketches compel artists to focus on the essentials, and how to draw anything honing their capacity to discern and reproduce the most critical features of a scene or object.
3. Encouraging Fluidity and Confidence:
The nature of quick sketches encourages a fluid and confident drawing style. There’s no room for hesitation or overthinking; instead, artists are prompted to trust their instincts and make bold, decisive strokes. This not only fosters a sense of self-assurance in artistic expression but also contributes to the development of a unique and recognizable style.
3. Breaking the Fear of Imperfection:
In the world of art, the fear of imperfection can be a formidable barrier. Quick sketches act as a remedy to this fear, creating a space where mistakes are not only acceptable but embraced. The emphasis is on capturing the moment rather than achieving flawless precision. This mindset shift liberates artists from the pressure of perfection, fostering a more open and experimental approach to their work.
4. Exploration and Innovation:
Drawing more quick sketches opens doors to exploration and innovation. It becomes a playground for trying out new ideas, styles, and techniques. The brevity of each sketch allows for rapid experimentation, enabling artists to push boundaries, discover unexpected possibilities, and evolve creatively. This experimentation is a crucial ingredient in the recipe for artistic growth.
5. Building a Visual Vocabulary:
Each quick sketch contributes to the artist’s visual vocabulary. Through repetition and variation, artists build a repertoire of lines, shapes, and textures that become integral to their artistic language. This vocabulary becomes a versatile toolkit, ready to be employed in more elaborate works, providing a foundation for conveying depth, emotion, and narrative.
6. Cultivating a Habit of Consistent Practice:
The sheer act of drawing more quick sketches cultivates a habit of consistent practice. It encourages artists to integrate art into their daily lives, fostering a routine that is essential for skill development. This regularity ensures that the creative muscle is exercised regularly, resulting in steady progress over time.
In conclusion, The suggestion to “draw more quick sketches” is more than just a passing idea; it’s an open invitation to explore and grow as an artist of easy drawings. It encourages you to embark on a journey of self-discovery through your art.
5. Learn From Your Mistakes – Practice Over & Over
Through consistent practice and repetition, you not only refine your skills but also develop a resilience that propels you forward. Each stroke, whether right or wrong, becomes a building block in your artistic foundation. The key is to how to draw anything persistently practice, allowing yourself the freedom to learn from missteps and celebrate small victories. This approach transforms the creative process into a continuous cycle of improvement, where every attempt is an opportunity to evolve and excel in how to draw anything. So, keep practicing, learn from your mistakes, and witness the blossoming of your artistic prowess through dedication and perseverance.
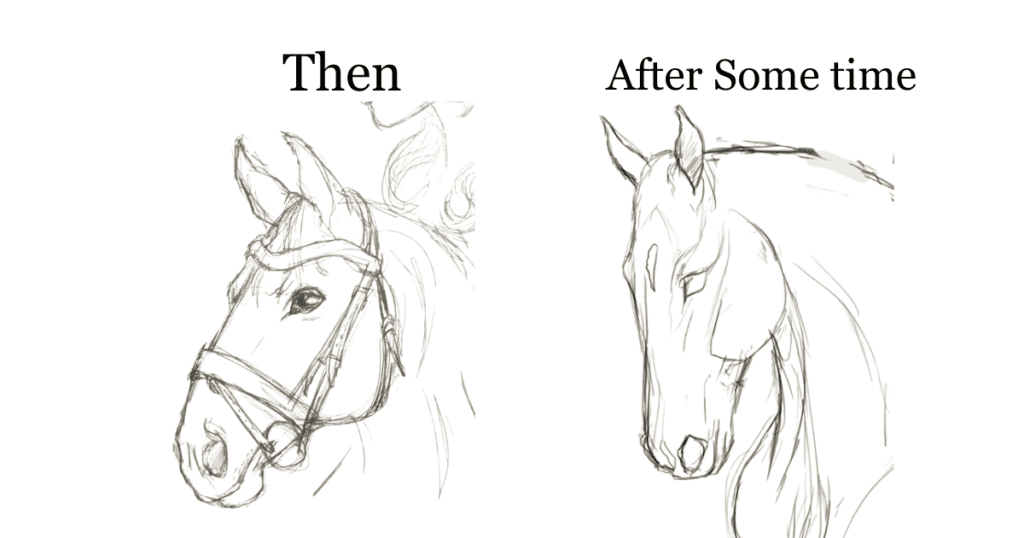
1. Start with Basic Shapes and light Lines, and Find the Right Proportions:
Begin your artistic journey by laying down the foundation with basic shapes and light lines. These initial strokes act as a guide, helping you establish the right proportions and overall composition of your drawing. Think of it as the skeleton of your artwork, providing structure and ensuring that your final piece will capture the intended form. This step is crucial for setting the groundwork, allowing you to map out the elements and their relationships within the composition. Take your time in this phase, as the precision you achieve here forms the backbone for the subsequent stages of refinement.
2. Refine Lines, Check Angles, and Add Solid Outlines:
As you progress, shift your focus to refining the lines, checking angles, and adding solid outlines to bring definition to your artwork. This stage is where your initial sketch starts to take on a more polished form. Refine the shapes, ensuring they align seamlessly with your vision. Pay close attention to angles and perspectives, adjusting as needed for a harmonious visual flow. The addition of solid outlines adds clarity, defining the edges and contours of your subjects. It’s the phase where how to draw anything your creation starts to emerge from its initial sketch, gaining structure and precision.
3. Add Detail and Texture, Shadows and Highlights:
Now comes the time to breathe life into your drawings by adding intricate details, and textures, and playing with shadows and highlights. This is the stage where your creativity takes center stage, as you delve into the nuances that make your artwork unique. Add texture to surfaces, details to features, and carefully consider the interplay of light and shadow. This attention to detail elevates your how to draw anything, transforming it from a two-dimensional sketch to a multi-dimensional piece of art. Experiment with shading techniques, use highlights to accentuate focal points, and allow your imagination to guide how to draw anything the finishing touches that bring your creation to its full expressive potential.
Bonus
6. Learn What Things Are – And Why They Are
Your problem: how to draw anything from imagination but you can’t draw. Everything goes right when you follow a tutorial(how to draw anything), but then you can’t remember the steps, or there’s only one pose that turns out good.
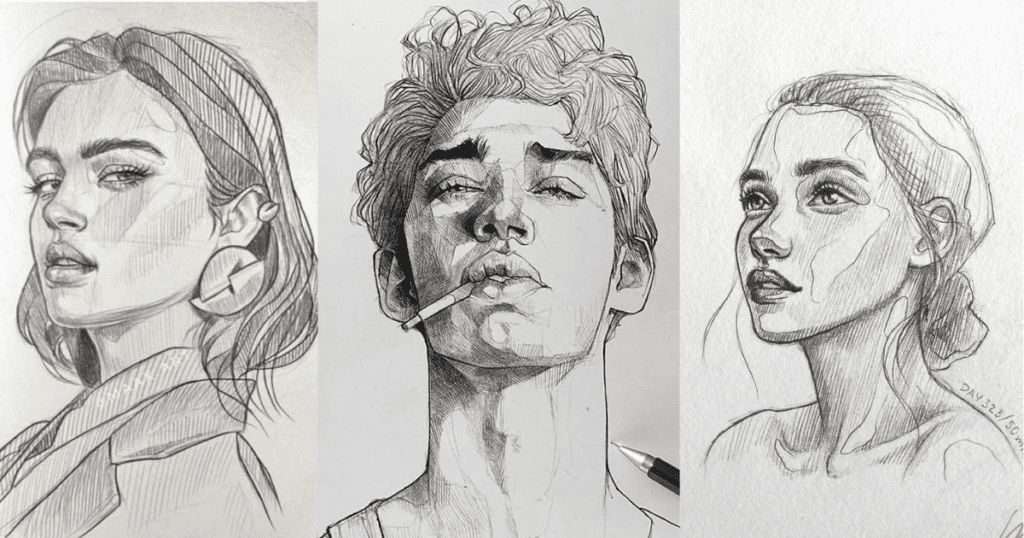
If you struggle with drawing from imagination and find it difficult to remember the steps or poses, there are ways to improve your skills. One way is to study other artists and memorize how they draw, rather than studying life or photos. Another way is to practice drawing from construction, which involves breaking down complex objects into basic forms and studying perspective. Additionally, you can explore online resources and tutorials that guide drawing from imagination. By practicing frequently and refining your skills, you can improve your ability to draw from imagination and develop your own unique style. Remember to be patient and persistent, as this is a skill that takes time and dedication to master.
- Learning what things are involves identifying them – recognizing a tree, a chair, or a book. It’s like putting a name to a face, giving us a sense of familiarity with our surroundings. This initial step in understanding lays the groundwork for a more profound connection with the world.
- However, the true richness of comprehension comes when we ask why things are. This involves peeling back the layers to uncover the reasons, functions, and significance behind each object or concept. For instance, it’s not just about recognizing a tree but understanding its role in the ecosystem, providing oxygen, shade, and a habitat for various creatures.
- Consider a simple example like a chair. Learning what a chair is involves recognizing it as a piece of furniture to sit on. But understanding why it is goes further. A chair is designed for comfort, providing a place for rest or work. It’s crafted with purpose, considering the human need for a supportive and elevated surface.
This process of learning what things are and why they are is a continuous journey, and it’s not limited to physical objects. It extends to concepts, ideas, and even emotions. Take love, for instance. Learning what love is involves recognizing it as a profound connection between individuals. However, understanding why it encompasses exploring the emotional, psychological, and evolutionary aspects that make love a fundamental part of the human experience.
As we embark on this journey of learning, curiosity becomes our compass. Asking questions and seeking answers lead to a deeper appreciation of the intricacies of the world. It’s not merely a matter of memorizing facts but cultivating a genuine interest in the stories and purposes behind every facet of existence.
Moreover, this quest for understanding enriches our perspective and broadens our horizons. It fosters a sense of interconnectedness, as we realize that everything in the world has a role and contributes to the intricate tapestry of life. Learning what things are and why they are becomes a means of fostering empathy and respect for the diversity and complexity that surrounds us.
In essence, this process is an invitation to be lifelong learners. It encourages us to approach the world with a sense of wonder, embracing the joy of discovery. Whether it’s the beauty of nature, the functionality of everyday objects, or the depth of human emotions, each revelation adds a layer to our understanding and enhances the richness of our experience.
So, let’s continue this journey of learning – not just to know the names of things but to understand the stories they tell, the roles they play, and the beauty they bring to the intricate mosaic of life. Through this continuous exploration, we cultivate a deeper connection with the world, making the learning process not just a pursuit of knowledge but a celebration of the profound and fascinating nature of existence.
You are now prepared to begin drawing!
If you’ve followed the tutorial closely, with a bit of practice, you should be able to draw anything smoothly and tackle more advanced tutorials. While the beginner drawing exercises might feel dull, they’re crucial and should be mastered. If you found them easy, fantastic – you’re prepared! But if you face challenges, it’s best to pause and keep practicing until you get better.
FAQ
Q1. What items are good for beginners who want to learn to draw?
A beginner can start with any pencil, but I suggest a few extra items. Three pencils, a 2H, HB, and a 2B. A pencil sharpener is kind of important, what type is a matter of personal preference. Two erasers, a white plastic eraser. Paper is an absolute necessity, but it doesn’t matter what kind very much for beginners.
Q2. I want to start drawing sketches. How long will it take for me to learn from zero? My goal is to draw what I picture in my mind.
The time it takes to learn drawing varies, but with consistent practice, you can start creating basic sketches within a few weeks. To draw what you picture in your mind, expect the journey to span several months to a couple of years. Patience and regular practice are key in progressing from a beginner to realizing your artistic visions
Q3. Is drawing a natural talent or learned?
Well, Drawing is both a learned skill and a natural talent. While some individuals may have an inherent ability, anyone can acquire drawing skills through practice and learning. It’s a blend of innate talent and honed expertise, making it accessible to those willing to put in effort
