Drawing is a skill that may be improved with practice, patience, and a little direction. Kneaded erasers are an essential tool in an artist’s toolbox, and mastering their use can significantly enhance the quality of your art. This guide will provide you with a comprehensive understanding of kneaded erasers, their unique features, and how to effectively use them for realistic drawing.
In this lesson, we will cover what a kneadable eraser is, what its usage is, how mistakes happen in your artwork, and how a kneadable eraser can save your artwork. so let’s begin……….
What is a Kneaded Eraser
A kneadable eraser, often known as soft rubber, is an effective tool used by artists, illustrators, and drafters to erase and highlight their work. Kneadable erasers, unlike typical erasers, are moldable and flexible, allowing for detailed and controlled erasing while leaving no eraser waste behind. This Unique feature makes them a vital resource for anyone working with graphite, charcoal, pastels, and other drawing mediums.
The mobility of a kneadable eraser divides it from other types of erasers. It can be stretched, molded, and compressed, allowing artists to shape it to their specifications. These erasers are perfect for removing and highlighting many mediums, including graphite, charcoal, pastel, and chalk.
Functions of a kneadable eraser
Several key features set kneadable erasers apart from regular erasers:
- No Waste: Unlike normal erasers, kneadable erasers do not leave any eraser waste or residue behind, ensuring that the drawing surface is not disturbed.
- Self-Cleaning: Kneadable erasers absorb graphite and may be cleaned by simply kneading them between your fingers.
- Shape-shifting: The ability to mold kneaded erasers into any shape makes them not only a fantastic erasing tool but also an essential drawing tool.
Methods for Using a Kneaded Eraser
Understanding how to use a kneaded eraser will greatly improve your sketching abilities. Let’s look at three alternative strategies you can employ.
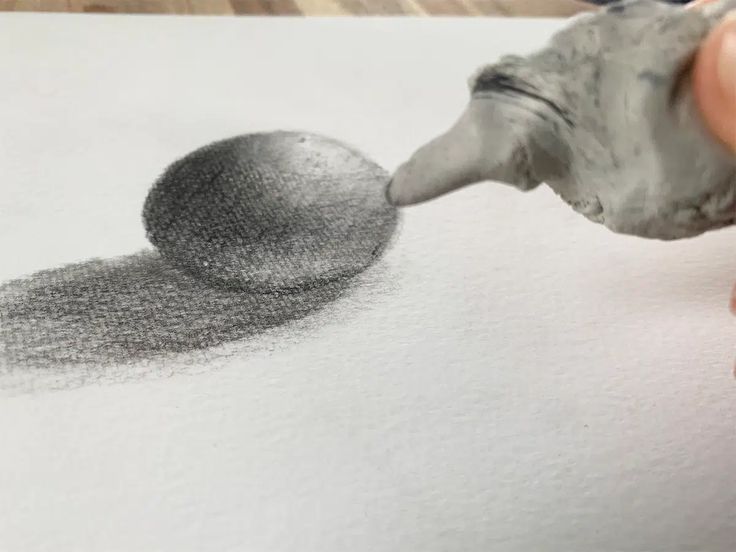
1. Detailing
A kneaded eraser can be molded into a pencil point to brighten individual spots or minor irregularities in value. This is quite useful in the advanced phases of shading and refining your drawing This helps to create jaw drops detailing value if you can use it perfectly or properly.

2. Highlights
Kneaded erasers produce no waste. I did not even rub the paper. Simply press and lift. Do this a few times, and the graphite will be gone. However, this may not work if the pencil marks are too dark. In the image below, I simply gave it a light press.
I typically use the press-and-lift approach, but I squeeze the eraser and swipe the graphite with light strokes for things like highlighting hair. Avoid applying too much pressure to your drawing, since this will bend the eraser.
If the eraser begins to change shape or becomes too dirty, fold it into itself. Pinch it to a fine tip and proceed.
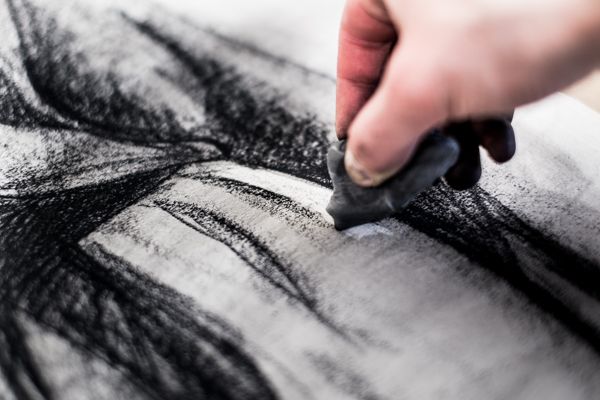
3. Rendering
A kneaded eraser can be used to create an image rather than simply removing undesired marks. Rendering is the process of creating an image by first laying down darker tones and then softening them using an eraser. Kneaded erasers are also useful for lightening small areas and creating highlights, such as light reflected off an eye. Rendering can be used to create whole drawings as well as smaller sections of larger drawings.

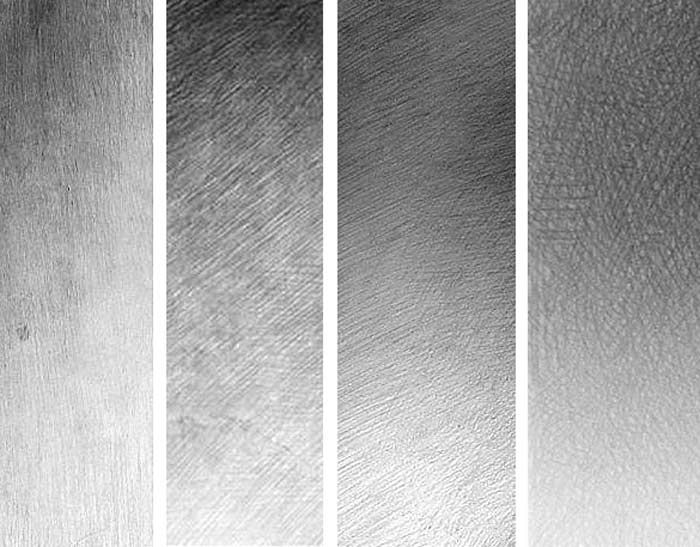
4. Lighting Areas
To brighten your drawing, flatten the eraser so it has a big, flat surface area and drag it over it. To use this method well, you must practice and have skill.

5. Remove smudges
It also helps to remove unwanted smudges and provide a realistic look to your artwork. gently sweep the eraser across any smudges to remove them. To avoid crumpling the paper, begin at the center of the page and work outward.
However, kneaded erasers are not particularly effective in removing pencil lines. Use a rubber or kneaded eraser for this.
6. Sharp edges
By providing the eraser with a flat, sharp edge, you can use it to erase sharper lines, generate sharper lines, or clean up and sharpen existing edges.
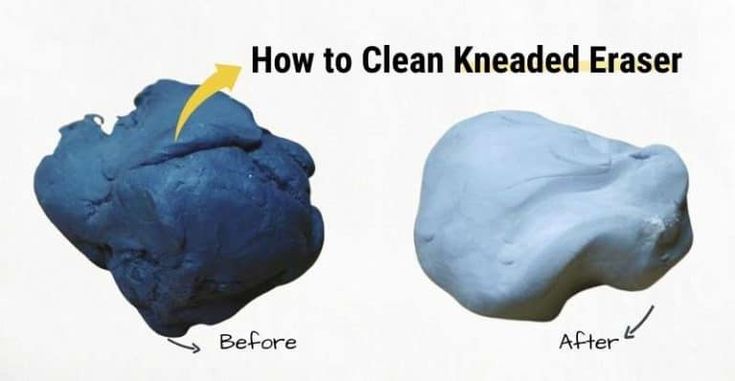
How to clean a kneaded eraser
Since kneaded erasers absorb graphite, they become dirtier with each usage. To clean a kneaded eraser, stretch and knead it till it turns light gray. They will eventually become unusable due to the accumulation of graphite, charcoal, dust, or other particles in the eraser. likewise just put away one so far due to the significant building up of dust and dirt from the eraser constantly falling over my desk surface. That isn’t a major deal because they’re normally inexpensive and available at most art supply stores.
Derwent’s kneaded erasers have the ideal texture for me. If you get a different brand and find it too difficult to work with, cut it in half or start with just one quarter. You may immediately improve the softness by making graphite shavings using a sandpaper pencil sharpener, folding the graphite into the eraser, and then pulling. I’ve tried a few various brands, and my favorites so far are Brustro and Derwent because of their softness and ability to pick up graphite with the smallest touch right out of the package. Other brands I tried were either too hard, difficult to form and keep in the desired shape, or required a lot of friction to erase.
The Best Kneaded Eraser Brand
While there are several brands of kneaded erasers available, some artists prefer specific ones. For example, some people like stiffer kneaded erasers because they keep their shape better and make the procedures indicated above easier to apply. My personal favorite:
Wrapping up
Mastering the usage of a kneaded eraser will greatly improve your realistic drawing abilities. You may advance your craft by recognizing its particular skills and learning how to apply them effectively. So, grab a kneaded eraser, practice these techniques, and watch your art talents improve!
In the world of art, a kneaded eraser is more than just a tool for correcting errors. It’s a versatile tool that can help you draw more intricate and realistic images. Once you’ve mastered how to use a kneaded eraser properly, you’ll wonder how you ever drew without one. Whether you’re a seasoned artist or a newbie just getting started, a kneaded eraser is an essential addition to your art tools.
FAQ
Q1. How long does a kneaded eraser last?
They will eventually become worthless since they have absorbed far too much. It’s more about utilization than time. So an unused eraser should last for more than a year, if not longer, in its wrapper. Keep in mind, however, that they are not meant to be kept forever.
Q2. Is kneaded eraser like clay?
A kneadable eraser, often known as soft rubber, is an effective tool used by artists, illustrators, and drafters to erase and highlight their work. Kneadable erasers, unlike typical erasers, are moldable and flexible, allowing for detailed and controlled erasing while leaving no eraser waste behind.
Q3. Can you add lotion to the kneaded eraser?
To keep your kneaded eraser soft, knead it often and use it. Do not add lotion in it because it can get too sticky and you won’t be able to use it.


Thanks for sharing. I read many of your blog posts, cool, your blog is very good.