Hatching and cross hatching techniques are tricky methods used in art for years to add texture, depth, and level of detail. These approaches include strategically placing lines to generate a range of visual effects. The article goes into the involved process of learning these techniques, covering everything from the fundamentals to more advanced applications and addressing typical obstacles for artists.
Key Takeaways
- Understanding the fundamental differences between hatching and cross-hatching is important for effective use.
- Understanding the direction, density, and layering of lines could greatly boost texture and depth in artwork.
- Effective cross-hatching requires careful consideration of line weight and spacing to achieve desired visual effects.
- Combining hatching with various sketching techniques can produce unique and dynamic artworks.
- Studying the works of notable artists who master in these techniques can provide invaluable insights and inspiration.
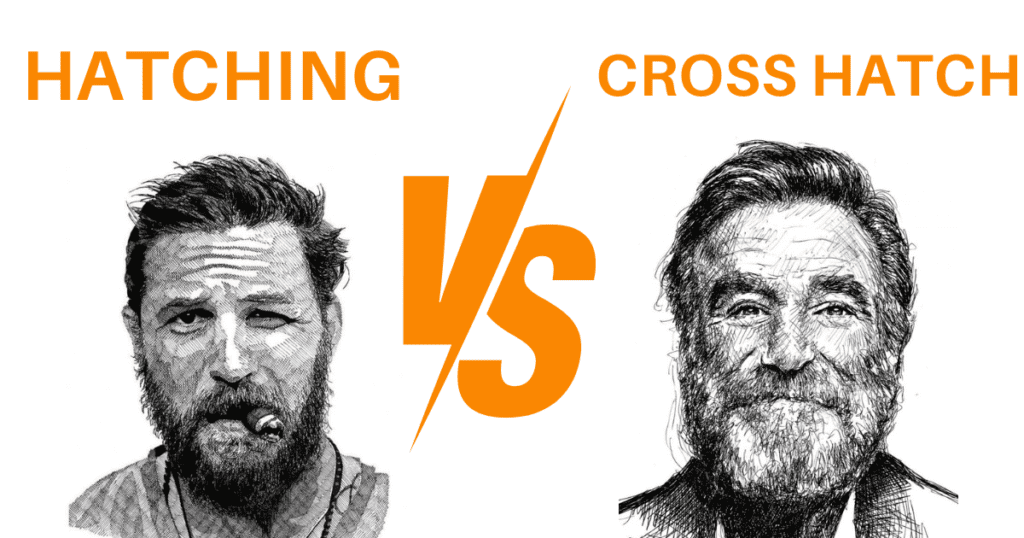
What exactly is meant by hatching and cross-hatching?
Hatching and cross-hatching are techniques that have been used for centuries to create texture and shading in drawings. Hatching involves drawing parallel lines to build up tone and texture, while cross-hatching uses layers of intersecting lines. These methods were pivotal in the works of old masters like Rembrandt and Dürer, who exploited these techniques to convey depth and dimension in their sketches.
Hatching and cross hatching are two linear drawing methods that can be used to produce texture, value, and the illusion of shape and light. Hatching and cross-hatching are often used as ways to apply when the medium is linear.
Differentiating between Hatching and Cross Hatching Techniques
Understanding the difference between hatching and cross hatching is fundamental to learning these methods. Hatching generates tone and texture with parallel lines, whereas cross hatching creates another layer of lines, usually at a perpendicular or sideways angle. This additional layer improves contrast and depth in your drawings, making them much more vibrant and eye-catching.
Using different hatching techniques, you can draw several kinds of structures and shadows. You can switch between the techniques or choose one to stick with for your drawing. It also doesn’t matter if you draw with ink, pencil, ballpoint pen, or any other tool.
Effective Hatching Techniques
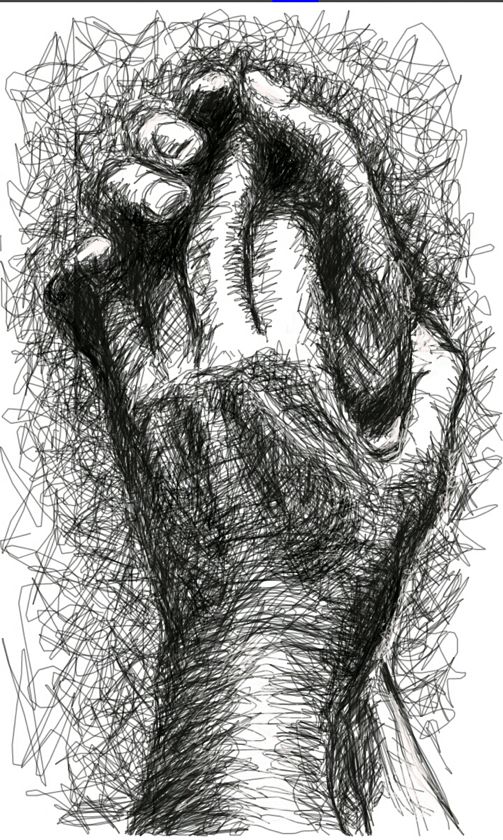
1. Cross Hatching
Cross hatching is a key technique for creating values. There are some details to this technique that are sometimes overlooked. The most important thing is to keep control of the angles of the cross lines, avoiding straight and severely acute angles. Cross hatching comes from the fact that the strokes cross each other. The strokes cross in at least two directions. The more strokes that cross, the darker the region.
This process results in highly planned and controlled marks that are extremely exact and precise. Others just crossed the lines at random, This can mess up your artwork. Some subjects benefit from more flexible techniques, whereas others benefit from more strict approaches.
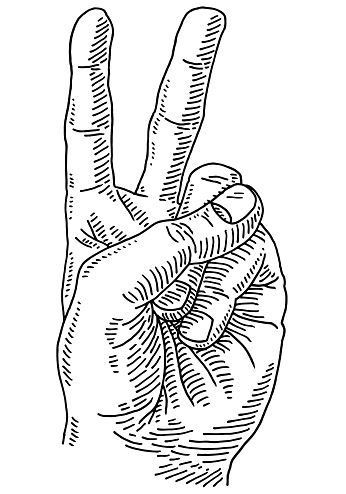
2. Contour Hatching
As opposed to making the lines parallel, weave them around a surface that curves. While drawing, imagine the lines repeating around the curving surface. The lines might expand from a tight shape to cover a broader area. As they progress, the lines may get so far apart that they no longer read as a tone area, but rather as individual lines. Resolve this by drawing a second set of lines from the outside of the broad edge to the narrow point. This hatching technique improves your experience of volume and three-dimensionality of whatever you’re sketching while also adding value.
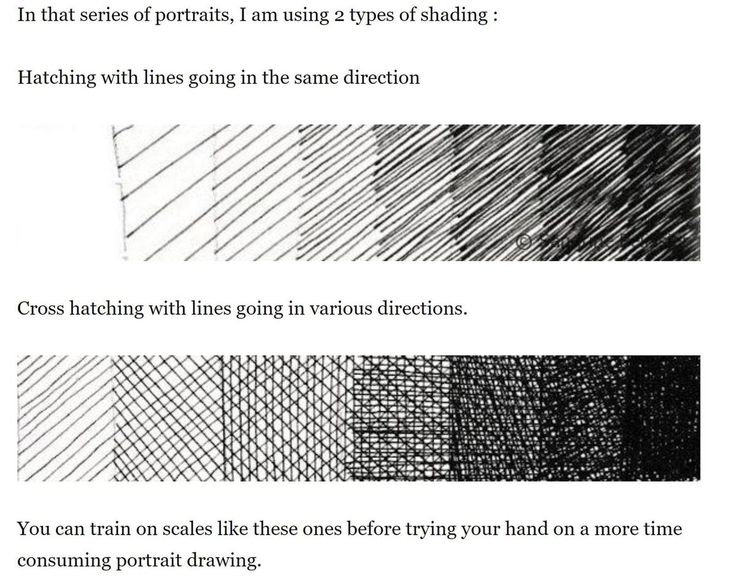
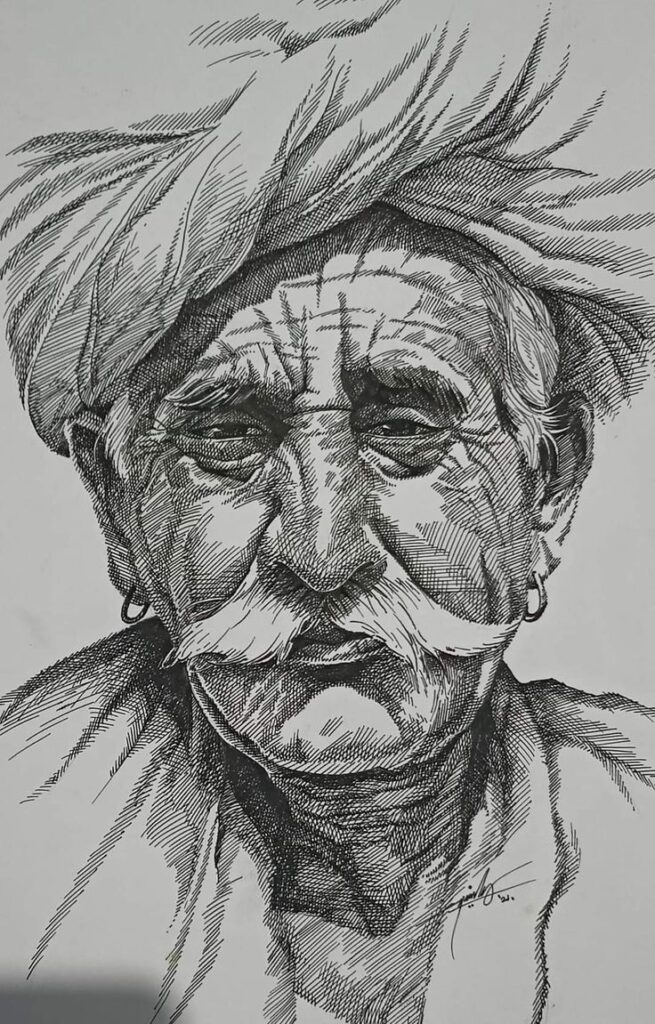
3. Parallel Hatching
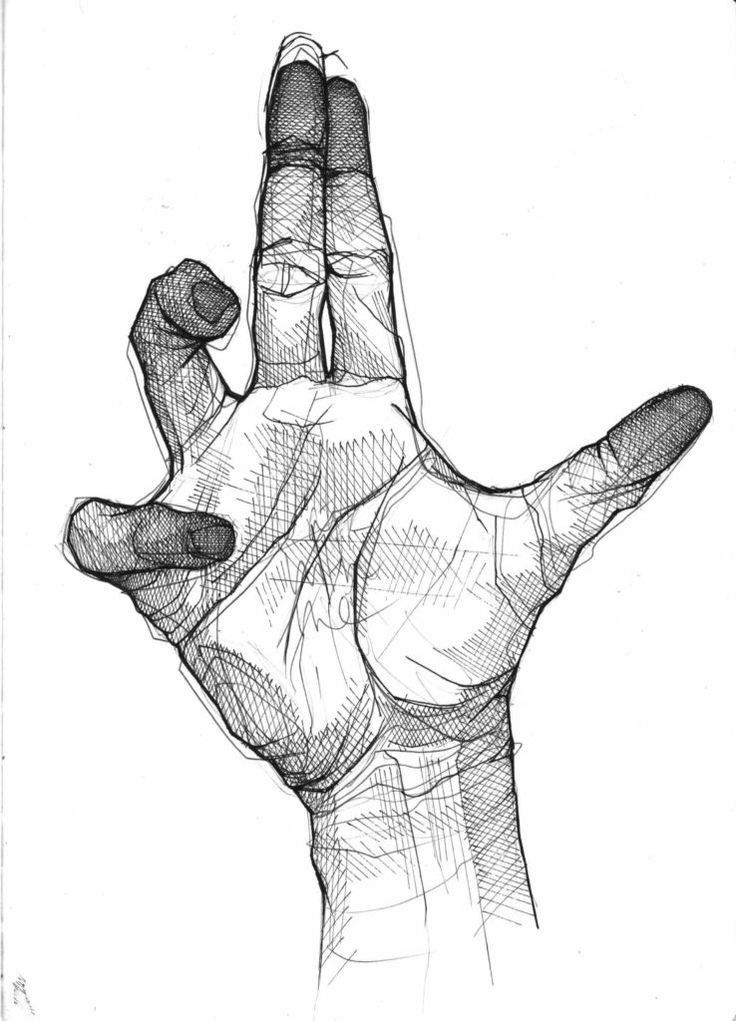
Parallel hatching is one of the most fundamental types of hatching, and it is a highly efficient method of showing value (the light and darkness) in a sketch. It is made up of sets of parallel lines arranged tightly together. Anywhere you use hatching in a drawing, the area will look darker or in shadow, all of the hatching is vertical, although it may be set at any angle. Some hatch markings, like those on the top of the index finger, are closer together than others. When you increase the density of a group of hatch marks, the region becomes darker, which can be beneficial for creating value changes, as we’ll see.
So, Parallel hatching involves drawing strokes parallel to each other. The region becomes darker as the distance between the strokes decreases.
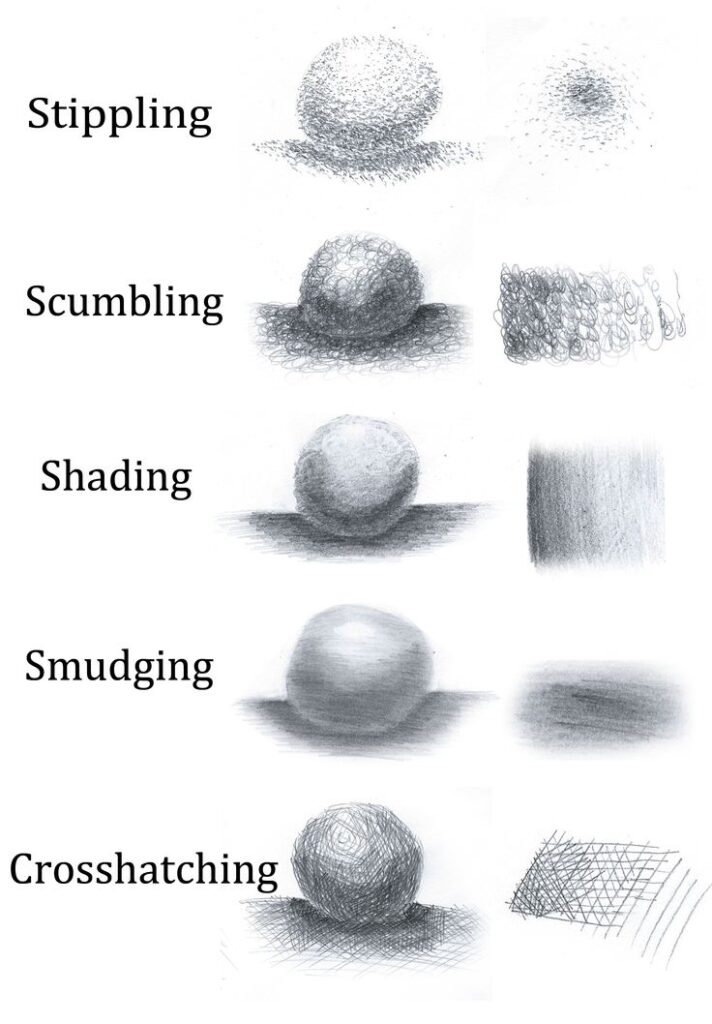
4. Stippling Hatching
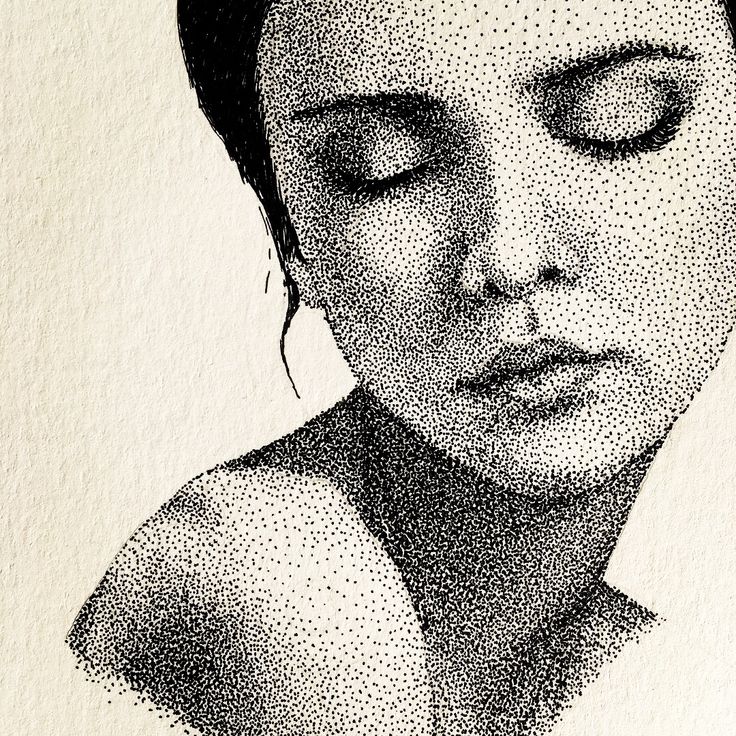
Stippling is a method that uses dots or small lines to create the appearance of texture, density, and tone. The more dots you add, the darker the region becomes. You may also change the dots’ size, shape, and spacing to achieve different results. Stippling also can be used to add realistic elements like fur, hair, skin, and sand. You can also use stippling to make abstract patterns like stars, clouds, and smoke.
5. Scribbles Hatching
Scribbling is a fantastic technique for drawing specialized themes, such as trees or hair, because it not only provides values but also conveys texture. In the painting below, I used scribbling to create the tree’s leaves and the appearance of grass beneath them.
6. Smudging
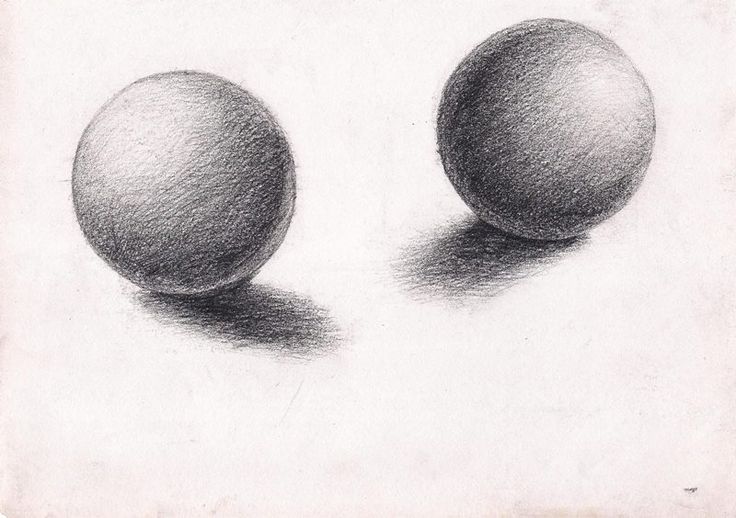
Smudging the pigment in your drawing in a regulated (or less controlled, depending on the art style) manner. This results in a brilliantly soft and subtle shading technique that can appear extremely realistic or quite natural, depending on how it is applied. When the grain of the paper shows through, this shading technique can be incredibly lifelike, giving it a skin-like appearance.
You can smudge with many different kinds of tools, including your fingertip, a soft eraser, cloth, tissues, or brushes. It is generally not recommended to use your finger to smudge because the oils in our skin might make it difficult to remove later. You can also use different movements to achieve unique effects, such as smearing in little circular motions or pulling the shading in long lines.
Cross Hatching for Depth and Dimension
Methods for layering cross-hatched lines
When I’m trying to give depth to my drawings, I concentrate on how I layer my crosshatched lines. The goal is to progressively add layers without making the area too black too soon. I begin with light, spaced-out lines then add more layers as necessary to deepen the shadows.
Equal Line Weight and Spacing
Balancing the weight and spacing of lines is essential for a harmonious appearance. I make sure to adjust the pressure on my pencil to generate lines of varying weights. This modification helps to create a more dynamic and 3D look.
Looking into Advanced Concepts
Combining Hatching and Other Drawing Techniques
I’ve learned that combining hatching with other sketching techniques, such as stippling or scumbling, helps increase the complexity and texture of my artwork. This combination creates a richer, more layered visual experience. Experimenting with multiple approaches on the same piece can produce unexpected and beautiful outcomes.
Using Hatching in large-scale artworks
When scaling up, it can be difficult to retain hatching integrity. To guarantee that the artwork maintains its intended effect, I use consistent line weight and spacing. Large-scale projects necessitate rigorous preparation and, in many cases, a collaborative effort to ensure successful hatching.
Common Challenges and Solutions
Avoiding Overworking the Medium
One of the most difficult aspects of perfecting hatching and cross hatching is not overworking the medium. It’s easy to get carried away and draw too many lines, which can make the artwork appear dirty or congested. To avoid this, I usually set up specific goals for each layer of lines and take regular breaks to examine my work.
Dealing with Unequal Lines
Unequal line work might break the overall harmony of your drawing. To address this, I concentrate on consistent pressure and speed when drawing lines. Practicing on various surfaces and with various line weights can also help you achieve more consistent lines.
Changing Techniques to Different Surfaces
Different surfaces may affect the appearance of hatching and cross-hatching. For example, a rough surface might disturb line consistency, but a smooth surface may not maintain the line properly. I experiment with various tools and pressures to see which works best for each type of surface. Here’s a quick guide to adjusting techniques.
- Rough surfaces: Use harder pencils or fine pens to maintain line integrity.
- Smooth surfaces: Opt for softer pencils or broader nibs to ensure lines adhere well.
- Textured surfaces: Adjust the angle of the tool to navigate the texture without losing line quality.
My View
Finally, learning the methods of hatching and cross-hatching can quite broaden an artist’s collection, providing a variety of textures and tones to their work. By knowing the finer points of line direction, density, and junction, artists may create depth and dimension that bring their works to life. Whether you’re a new looking to learn the fundamentals or an experienced artist honing your craft, practicing these techniques is an enjoyable hobby. Continue to experiment with hatching and cross-hatching in your artwork to explore how they could improve your visual scenes.
FAQ’s
Q1. What is the difference between hatching and cross-hatching?
Hatching involves drawing parallel lines to build texture and shadow while cross-hatching uses intersecting sets of lines to create deeper shades and more intense textures.
Q2. What are the best tools for hatching and cross-hatching?
Fine-tipped pens, pencils, and ink brushes are ideal for hatching and cross-hatching, allowing for precise control over line weight and spacing.
Q3. How can I control tone and value in my drawings using hatching techniques?
Control tone and value by varying the density and thickness of your lines. Closer and thicker lines create darker areas, while lighter shading can be achieved with more spaced and thinner lines.
Q4. What are some common challenges when learning hatching and cross-hatching?
Common challenges include maintaining consistent line spacing, avoiding overworking the medium, and achieving the desired depth and texture without making the artwork look cluttered.
Q5. Can hatching and cross-hatching be used in digital art?
Yes, hatching and cross-hatching can be effectively used in digital art. Many digital drawing programs offer brushes and tools that mimic the effects of traditional hatching techniques.
Q7. Who are some notable artists known for their hatching and cross-hatching techniques?
Artists like Albrecht Dürer and Leonardo da Vinci are famous for their mastery of hatching and cross-hatching, often using these techniques to add depth and realism to their sketches and prints.


HAxcnYBGVy
Hey people!!!!!
Good mood and good luck to everyone!!!!!
Hey there You have done a fantastic job I will certainly digg it and personally recommend to my friends Im confident theyll be benefited from this site