If you want to make smooth changes between shadows in your drawings, blending stumps is a must-have tool in your art kit. These simple stumps of tightly curled paper are ideal for combining charcoal or graphite to get adjusted values and give your drawings a clean, professional appearance. No matter how long you’ve been doing art, we’ll show you how to use and care for your blending stumps, as well as how to manufacture your own from scraps of paper.
What is Blending Stumps?
Blending stumps, a simple tool in the world of art may greatly improve the quality of your drawings when applied correctly. A blending stump, or paper stump, is a cylindrical sketching tool consisting of tightly rolled, soft paper with pointed ends. It is primarily used for blending, smearing, or smudging materials like graphite, charcoal, and pastels.
This detailed guide aims to shed light on how to utilize blending stumps successfully, the advantages they provide, and the situations in which they are most useful.
Things you should know
- Blending stumps are an essential tool in every artist’s toolbox, highlighted for their ability to make smooth connections between different tones or values.
- These stumps are cylindrical and typically constructed of soft, compressed paper.
- They come in a variety of sizes, allowing painters to focus on both broad and fine details in their drawings.
Difference Between Blending Stumps and Tortillions

Blending stumps and tortillions may appear similar and fulfill similar functions, but they are not the same. Both are cylindrical implements made of rolled paper. Tortillions, on the other hand, are typically smaller, with one pointed and one flat end each. They are great for blending in small, tight locations that demand a high degree of precision.
In contrast, blending stumps have two pointed ends and are often larger. They are ideal for mixing broad regions with the side and finer details with the tip.
Why do Artists use Blending Stumps?
The usage of blending stumps can significantly improve the quality of your drawing. They provide various benefits, including:
- Smooth Transitions: Blending stumps enable smooth transitions between distinct tones. This is very beneficial for drawing faces and realistic images that require subtle gradations.
- Control: They provide more control than other blending instruments, such as Q-tips or fingertips. This control provides for greater accuracy and detail in your work.
- Multiple uses: Blending stumps can be used with a variety of mediums, including graphite, charcoal, and pastel. This makes them a versatile addition to your art supplies.
How to Use Blending Stumps?
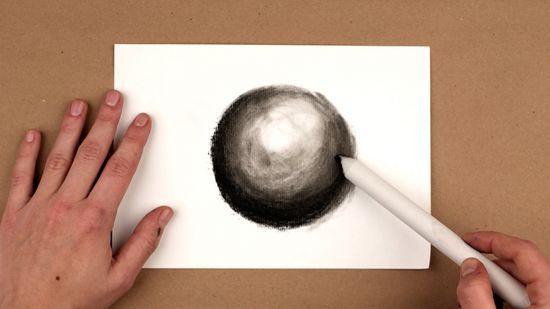
Using blending stumps can be difficult at first, but with some practice, you can master the technique. Here’s a quick step-by-step guide to get you started:
- Begin with Light Shading: Lightly shade the area you want to mix. Avoid using too much medium, because this might make blending more difficult
- Use the Blending Stump: Gently apply the blending stump to the shaded region. You can use the side for bigger regions and the tip for smaller, complex ones.
- Use Circular Motions: To combine the medium, use small circular motions. You can also use straight strokes, depending on the texture you wish to achieve.
- Adjusting the Pressure: Begin with light pressure and progressively raise as necessary. This allows you to adjust the degree of blending while avoiding over-blending.
- Clean the Stump: Rub your blending stump on a scrap piece of paper now and then to keep it clean. This helps remove excess media and avoid smudging.
Methods for Using Blending Stumps
There are several methods for using blending stumps, each creating a different effect. Here are a few common ones:
- Smudging: Smudging is the process of dragging the blending stump across different elements of a drawing to generate amazing patterns or textures.
- Shading: To add shade to your drawing, use a blending stump. Apply graphite or charcoal to a scrap piece of paper, then use the blending stump to carefully stroke it into your drawing.
- Blending: Use a clean blending technique to combine light and dark tones. Apply mild pressure and increase as necessary.
- Creating Values: Blending stumps can be used to create light and dark values. Use a clean stump for light values and a dirty stump for dark values.
How to Clean a Blending Stumps?
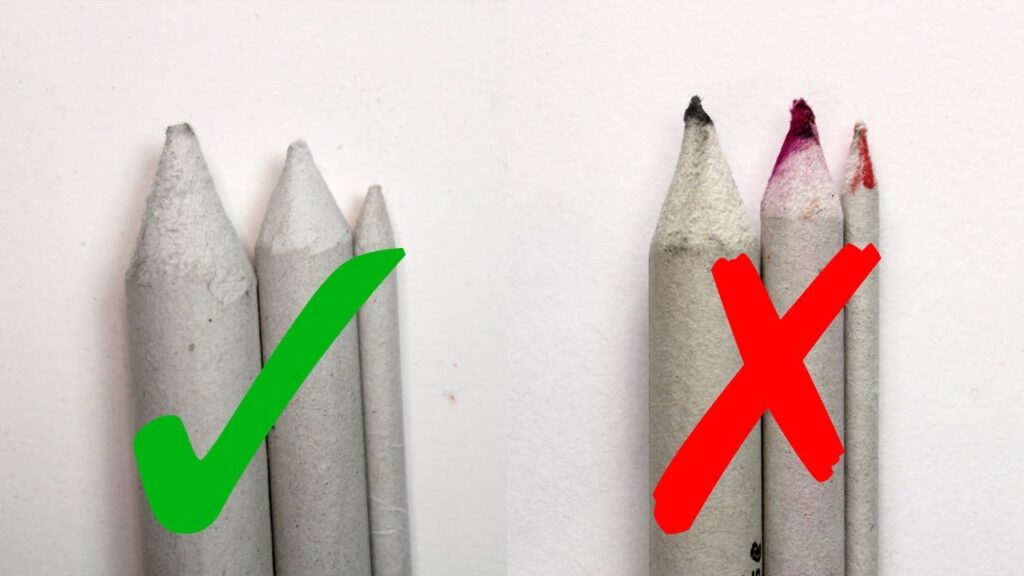
When the tip of your blending stumps gets dull or dirty. You can sharpen it with a sandpaper sharpener, which is normally included with the stump if bought in a pack. After sharpening the paper stump, you will see that it becomes a little out of focus.
I like this and plan to use it to combine lighter sections of my photo with no pressure. You can also use a nail filer or box cutter knife. But take caution! I propose having separate stumps for dark, medium, and light tones to save cleaning your stump several times for a single photo.
DIY: Make Your Own Blending Tool

Blending stumps are widely available for purchase, but you can also create your own at home. All you need is a sheet of paper and a small amount of patience:
- Cut the Paper: Cut a piece of paper diagonally from its corners.
- Roll the Paper: Begin at the shorter end and tightly roll the paper to the wider end. Use tape or glue to secure the paper roll.
- Form the Tip: With a toothpick or similar instrument, form the tip of your created blending stump.
Alternatives for Blending Stumps
While blending stumps is popular among many artists, other techniques may be used to produce similar results. Here are a few options to consider:
- Tissue Paper: Tissues are excellent for combining light or medium tones. They may be folded into a point for small regions or wrapped around your finger for bigger areas.
- Brush: Brushes can be used to blend, particularly in light regions. The brush you use will depend on the texture you wish to achieve.
- Q-Tips (Cotton Buds): These are ideal for merging huge regions. However, unless the cotton is rolled to a thin point, they are not suitable for use in tight locations.
- Fingers: While many artists recommend against using fingers to blend due to the natural oils they carry, they can be utilized in a pinch. Just make sure your fingertips are clean and dry.

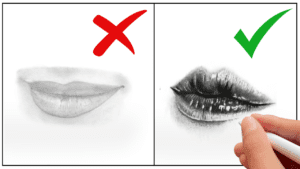
Do you really need blending stumps?
Some folks depend so much on blending stumps and tortillions that they won’t even begin to draw without them. Many starting artists overthink them, and in many cases, they are unnecessary. When blending stumps are overdone, or utilized when they aren’t needed, the resulting drawing can appear unclean and incomplete. However, when blending stumps are utilized appropriately and in the appropriate settings, the results may be extremely lifelike and realistic.
Final Thoughts
Mastering the usage of blending stumps can greatly improve your drawing abilities and open up new options in your artwork. However, keep in mind that they are only one of many tools available to artists. The trick is to learn when and how to use them successfully, and not to become unduly reliant on them. Remember that the texture of your subject and the paper should influence your option to utilize blending stumps.
Experiment with different approaches, and blending tools, and most importantly, enjoy the process of making art. Using practice and care, you’ll soon be able to create artwork that you’re pleased with using your blending stumps. Happy sketching!

Pingback: Smooth Shading Techniques You Got to Know. Read These 5 Tips
Somebody essentially lend a hand to make significantly articles Id state That is the very first time I frequented your website page and up to now I surprised with the research you made to make this actual submit amazing Wonderful task