Shading is a fundamental skill that every artist must master to breathe life into their drawings and sketches. Pencil drawing techniques provide depth, character, and emotion, transforming simple line drawings into realistic works of art. In this article, we will explore various pencil shading techniques that will take your artistry to the next level.
In this tutorial, I will share with you different pencil drawing techniques. This pencil shading techniques helps to enhance your artwork and a range of pencil shading techniques, from the fundamental to the advanced, empowering you to elevate your drawings to new heights of artistry.
Pencil drawing techniques: detailed guide
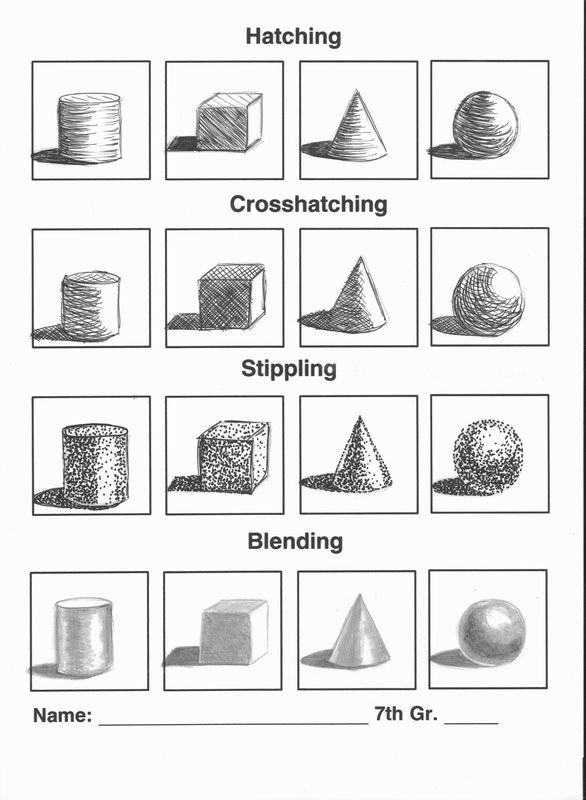
You will progressively walk through the shading process starting with shading the sphere. The proper depiction of light and shadow is the crux of creating three-dimensional art. When an artist is comfortable with these shapes, they are more apt to effectively draw and shade complex objects found in nature.
Understanding Shading in Art
Shading, in the world of art, refers to the process of adding varying degrees of light and dark to a drawing to give it a sense of depth, making it appear three-dimensional. It involves using different pencil strokes to create gradients of lightness and darkness, giving the illusion of shadows and highlights. Shading is not exclusive to pencil drawings; it can be used with other mediums as well, providing a versatile tool in the artist’s arsenal.
The Importance of Shading in Drawing
Shading plays a crucial role in creating an illusion of depth and volume in drawings. When done correctly, it can make your drawings appear three-dimensional, lend a variety of textures, and mimic the effects of light and shadow. Shading also contributes to the creation of hyper-realistic, photographic-quality drawings.
However, it’s worth noting that improper shading can render your artwork flat and untidy. Therefore, understanding and perfecting various shading techniques is vital for both amateur and seasoned artists.
The Concepts of Values, Tone, and Contrast
Before we delve into the different shading techniques, it’s crucial to understand the concepts of values, tone, and contrast in art:
- Value: Value refers to the lightness or darkness of a color or tone. It’s about creating a range of tones from light to dark, with the lightest being the highest value and the darkest being the lowest.
- Tone: Tone is quite similar to value. It describes how light or dark a color is. When you’re shading, you’re essentially manipulating the tone of your drawing.
- Contrast: Contrast is when two opposite values, a dark tone and a light one, are placed next to each other in a drawing. It’s a crucial concept for shading as it makes your drawing stand out and appear three-dimensional.
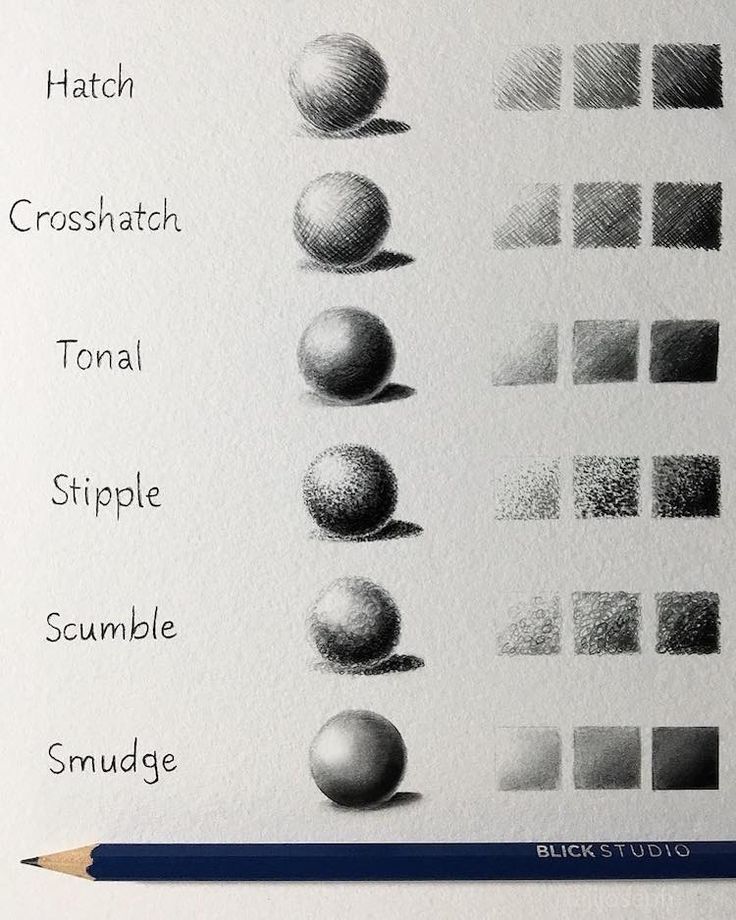
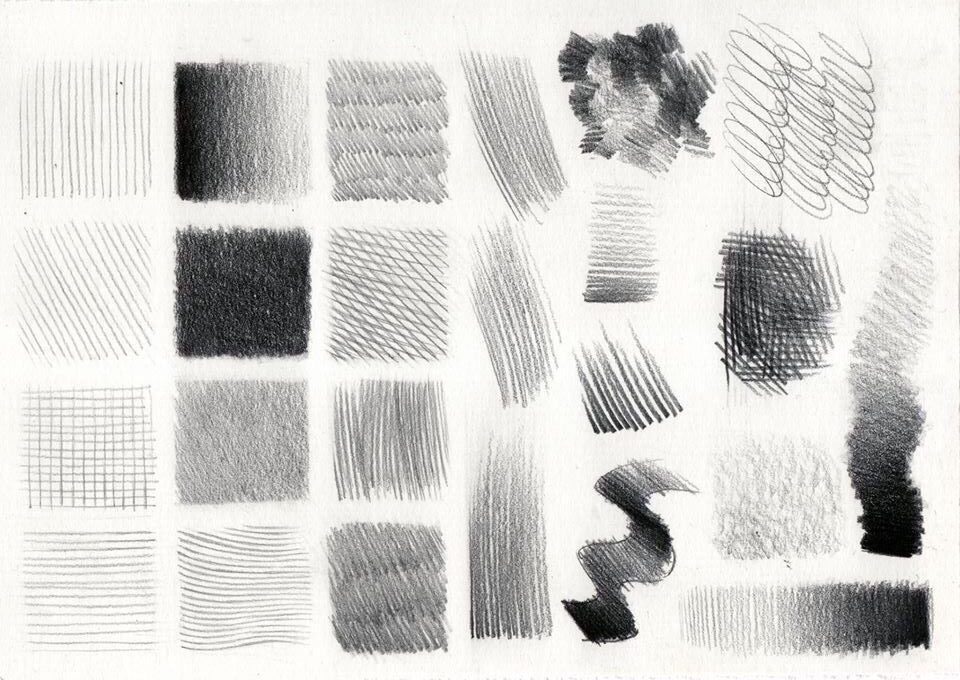
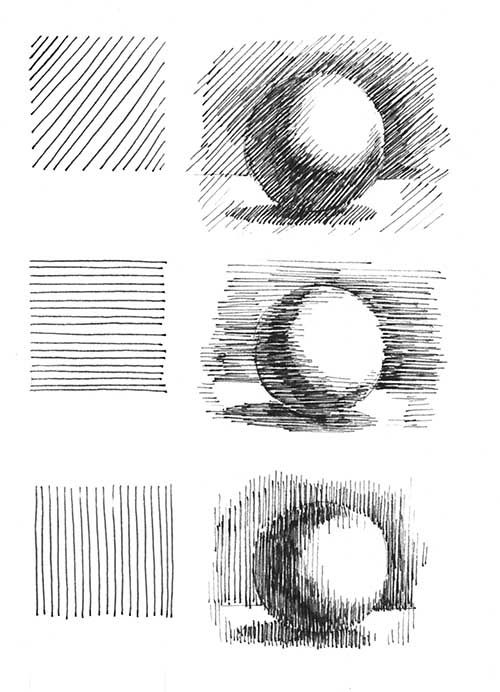
Pencil Shading Techniques
Now that we understand the basic principles of shading, let’s explore some of the most commonly used pencil shading techniques that can help you achieve realistic textures and effects in your drawings.
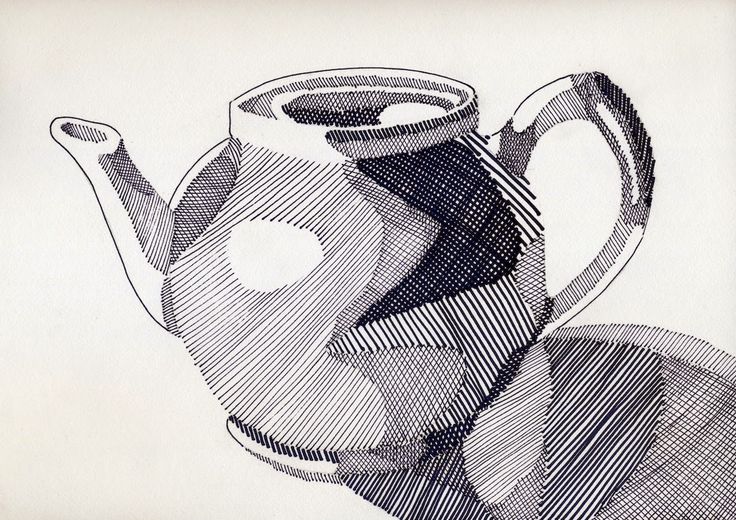
1. Hatching
Hatching is a basic shading technique that involves making parallel lines on your drawing. The lines can be horizontal, vertical, or angled, depending on the texture and form you want to depict. The closer the lines are to each other, the darker the area appears. On the other hand, lines spaced farther apart create lighter areas. Hatching is particularly useful for simulating textures like wood grain or brushed metals.

2. Cross-Hatching
Cross-hatching is a step up from hatching. It involves drawing lines that intersect each other, creating a sort of weave pattern. This technique is excellent for creating areas of varying darkness and texture in your drawing. It’s a versatile technique that can be adapted to most subjects, ranging from landscapes to portraits.

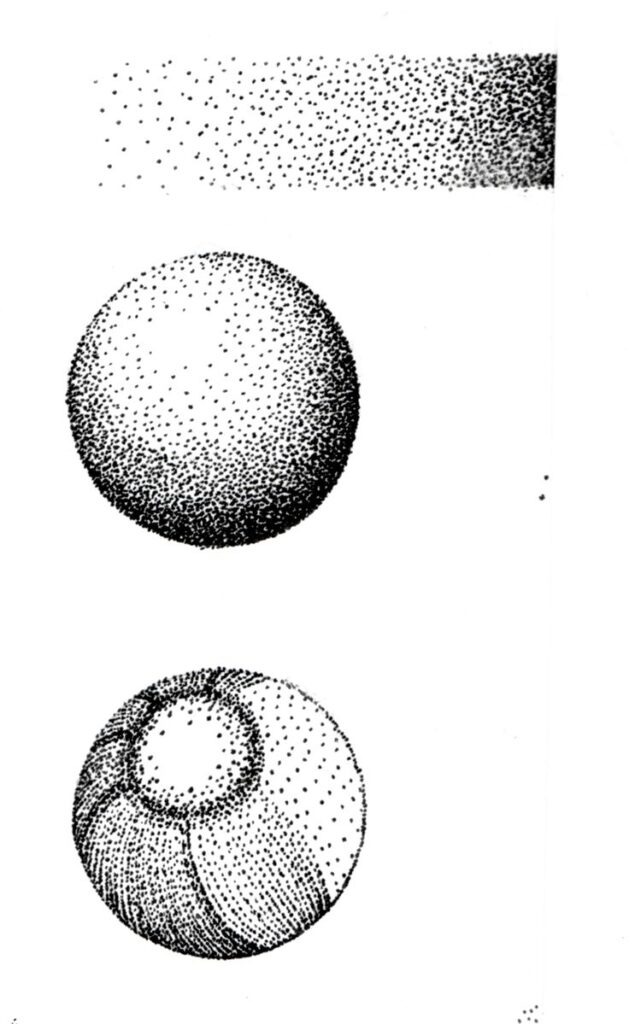
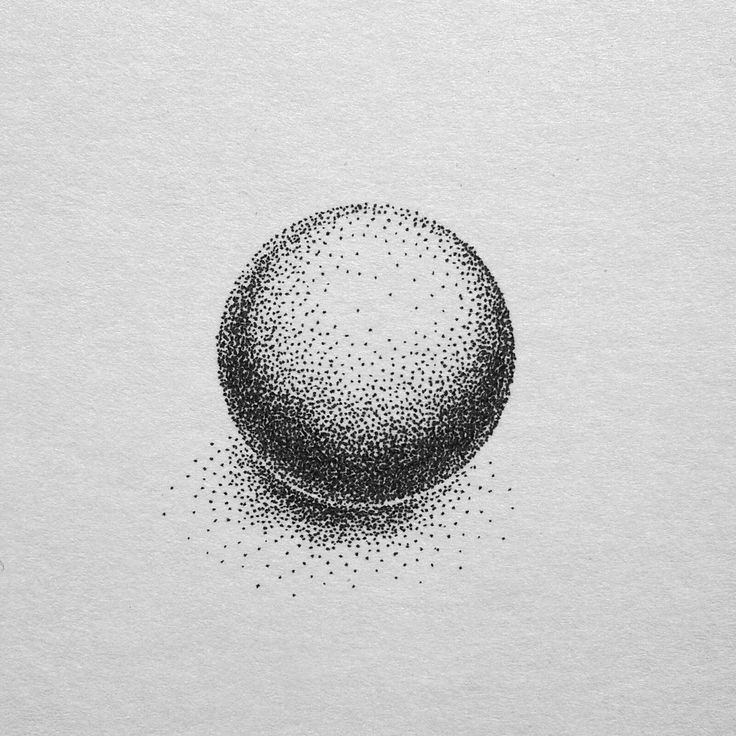
3. Stippling
Stippling involves making a series of tiny dots to create light and shadows in a drawing. The technique requires patience as creating numerous dots can be time-consuming, but the results are well worth the effort. To create darker shadows, place the dots closer to each other. For lighter areas, space the dots farther apart.
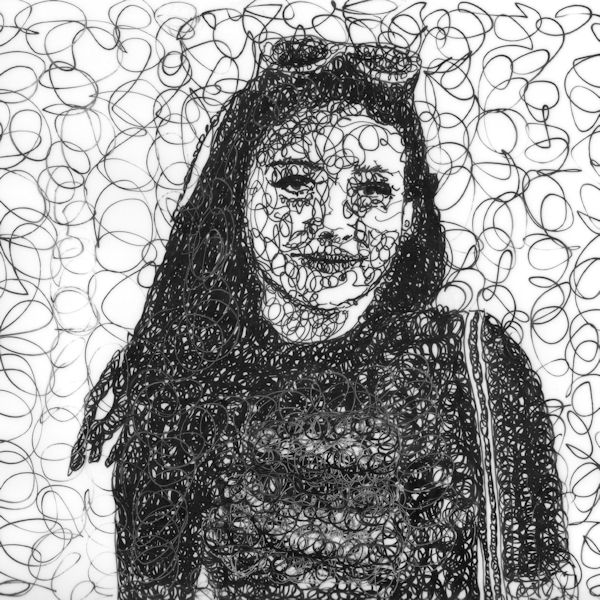
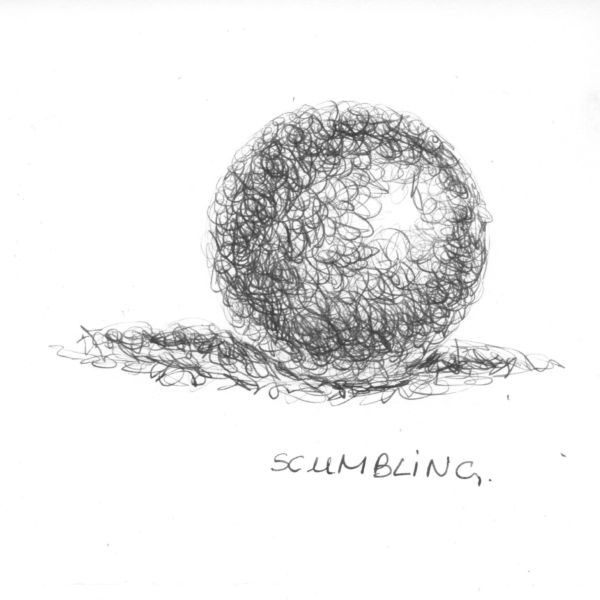
4. Scumbling
Scumbling is a technique that involves creating swirling pencil marks on a page. This technique is fun to try and can help you break out of a creative rut. By gradually drawing over your initial pencil lines, you can create a soft and fuzzy texture that’s excellent for conveying soft surfaces.

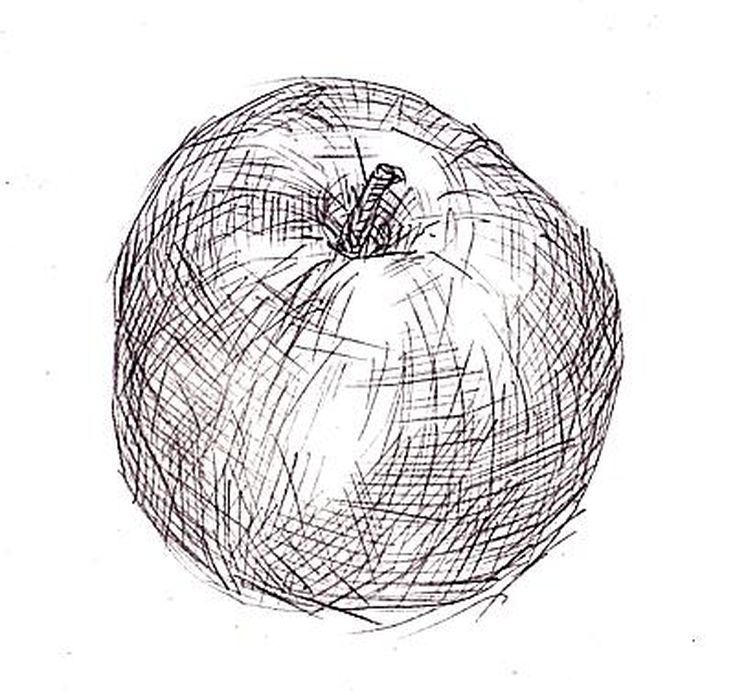
5. Contour Shading
Contour shading is a technique where you create lines that follow the shape of the subject you’re trying to represent. This technique can be used to shade things that already display lines running along the surface, no matter how subtle. For instance, apples, onions, and lips can be effectively shaded using contour shading.

Combining Shading Techniques
One of the most effective ways to create depth and realism in your drawings is by combining different shading techniques. For instance, you can start with hatching as a base layer to give your drawing a consistent texture, and then use cross-hatching to show stretched skin or fabric. Finally, you can use stippling or scumbling to create unique textures or effects.
Practicing Shading Techniques
Practicing is key to mastering any skill, and shading is no exception. Here are some exercises you can try to improve your shading skills:
- Creating a Value Scale: Draw a long rectangle and divide it into 7-10 equally-sized blocks. Start by shading one block as dark as you can. Then, progressively lighten the shade as you move to the next block until you reach the last block, which should be left blank.
- Shading Simple Shapes: Practice shading simple shapes like cones, cubes, cylinders, and spheres. These shapes form the building blocks of complex objects, so mastering them now will make shading more complex shapes easier in the future.
- Graduated Tone Exercises: These exercises involve creating a gradient of tone that moves in different directions across the page. You start by shading an area darkly and then gradually lighten the tone as you move across the page.
- Texture Exercises: Try to mimic different textures using shading techniques. For instance, try to create the texture of wood grain using hatching or the softness of a teddy bear using scumbling.
Remember, the key to successful shading is patience and practice. So grab your sketchbook and pencils, and start practicing these shading techniques. Soon, you’ll see a noticeable improvement in your drawing skills.


Pingback: Blending Stumps: 4 Free Methods for Creating Smooth Surface
Pingback: 5 Best Drawing Pencils for Beginners: Artist need to Try
Pingback: Still Life Object Drawing: Complete Detailed Tutorial
Pingback: Easy Steps to Master Realistic Elephant Drawing in 2024...
Pingback: Smooth Shading Techniques You Got to Know. Read These 5 Tips
Pingback: Human Face Drawing: 3 Powerful Ways to Shade a Face
startup talky This was beautiful Admin. Thank you for your reflections.